- In the Control Panel, select your project, and after that, select the Site for which you want to export CloseOut documentation.
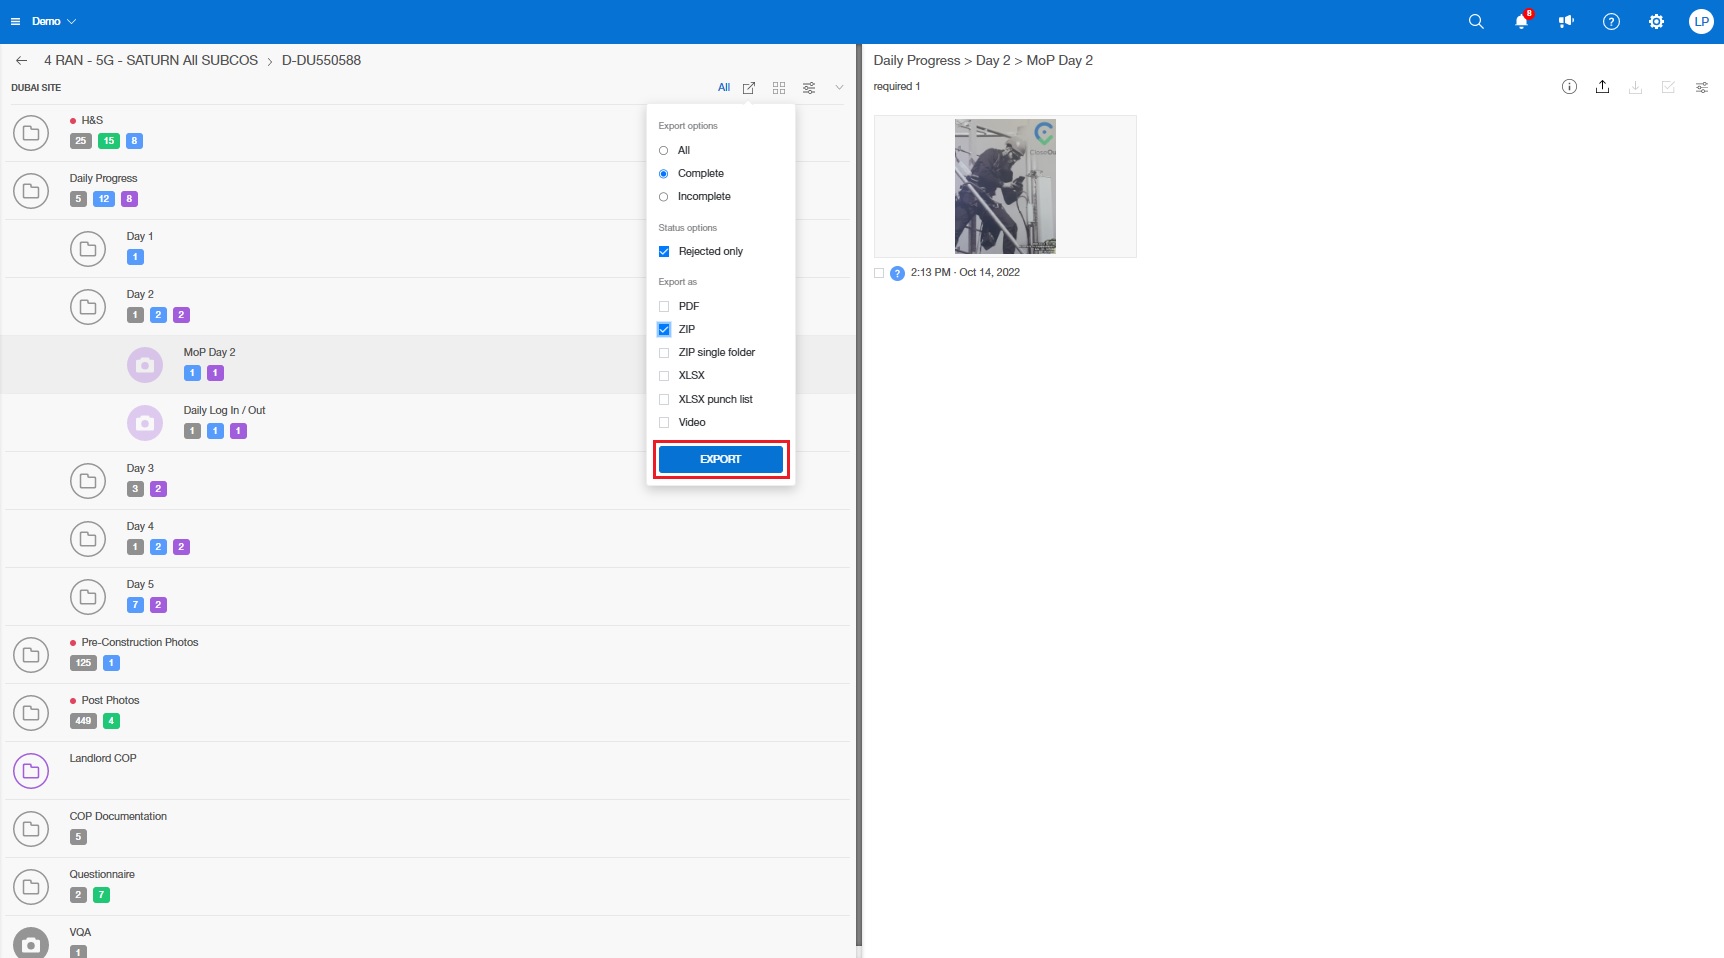
- Click on the Export button available on top of the folder structure:

Before you choose the export file type, you can filter out which positions will be included. You can pick between complete, incomplete, or all positions.
Then, once you've made your selection, you can further narrow down your options by checking or unchecking the "Rejected only" box. This will further filter your export, only including files that have been rejected, whether you selected "complete", "incomplete", or "all" positions.
- Select the format in which you want to export documentation. Depending on what kind of files you need, you can select different file types:
PDF: This will create PDF document with all approved images and project requirements. Template that will be used for PDF is selected while creating the project. If you want further customization (logo, different fields), you can contact your dedicated customer care manager.
ZIP: This will export all approved images in the structuralized way, mimicking the folder structure together in a ZIP file that you can download.
ZIP SINGLE FOLDER: This will export all approved images from all of the site folders, in a single ZIP file that you can download.
ZIP COLLAGE: This will export all approved images in the form of a collage, organized into folders by placeholder names and named according to media placeholder names. It's a perfect way to show or summarize all photos from a site after the work has been completed. The photos get combined into a collage (4 photos turn into one), and let you inspect, document or handover performed work by significantly decreasing the number of photos shared. Instead of sending 400 photos of performed works, a collage of 100 shows all of them but in a quicker to analyze and share format.
XLSX: If you select this document type, you will get an Excel file in your template. In order to do this, please share the template with your dedicated customer care manager. We will introduce that template to your Tenant. You will be able to map out on which sheet in which cells specific photos and checklist answers should land in the export.
XLSX Punchlist: this export option simplifies the process of tracking and documenting rejected positions by automatically exporting them to a clear and organized Excel file. This type of XLS file only has one form - there is no possibility of mapping or photo exporting. The file will include detailed list of information such as the position, date of rejection, the comment date, and the reason for rejection, making it easy to review and address any issues.
XLSX OCR: This export feature works seamlessly with our advanced AI_OCR module (which extracts text from images based on predefined keyword criteria. It allows you to capture multiple values from a single photo, such as SN, MAC, P, SSID, and automatically adds them as text comments on the image for easy reference). With the one-click “XLSX OCR” export option, all extracted data is compiled into a structured Excel file (placeholder name - keyword - OCR extracted text), ready for further processing or integration with related databases and inventory management systems.
VIDEO: This will create a video file composed of approved images from the project. You will also get a CSV file with a time code showing on which second in the video, a specific photo will be found. This will be downloaded as a ZIP folder with 2 files in it.
You can select multiple types of documents to export at once. The app will then create the wanted documents and you can download them individually.
- Click Export
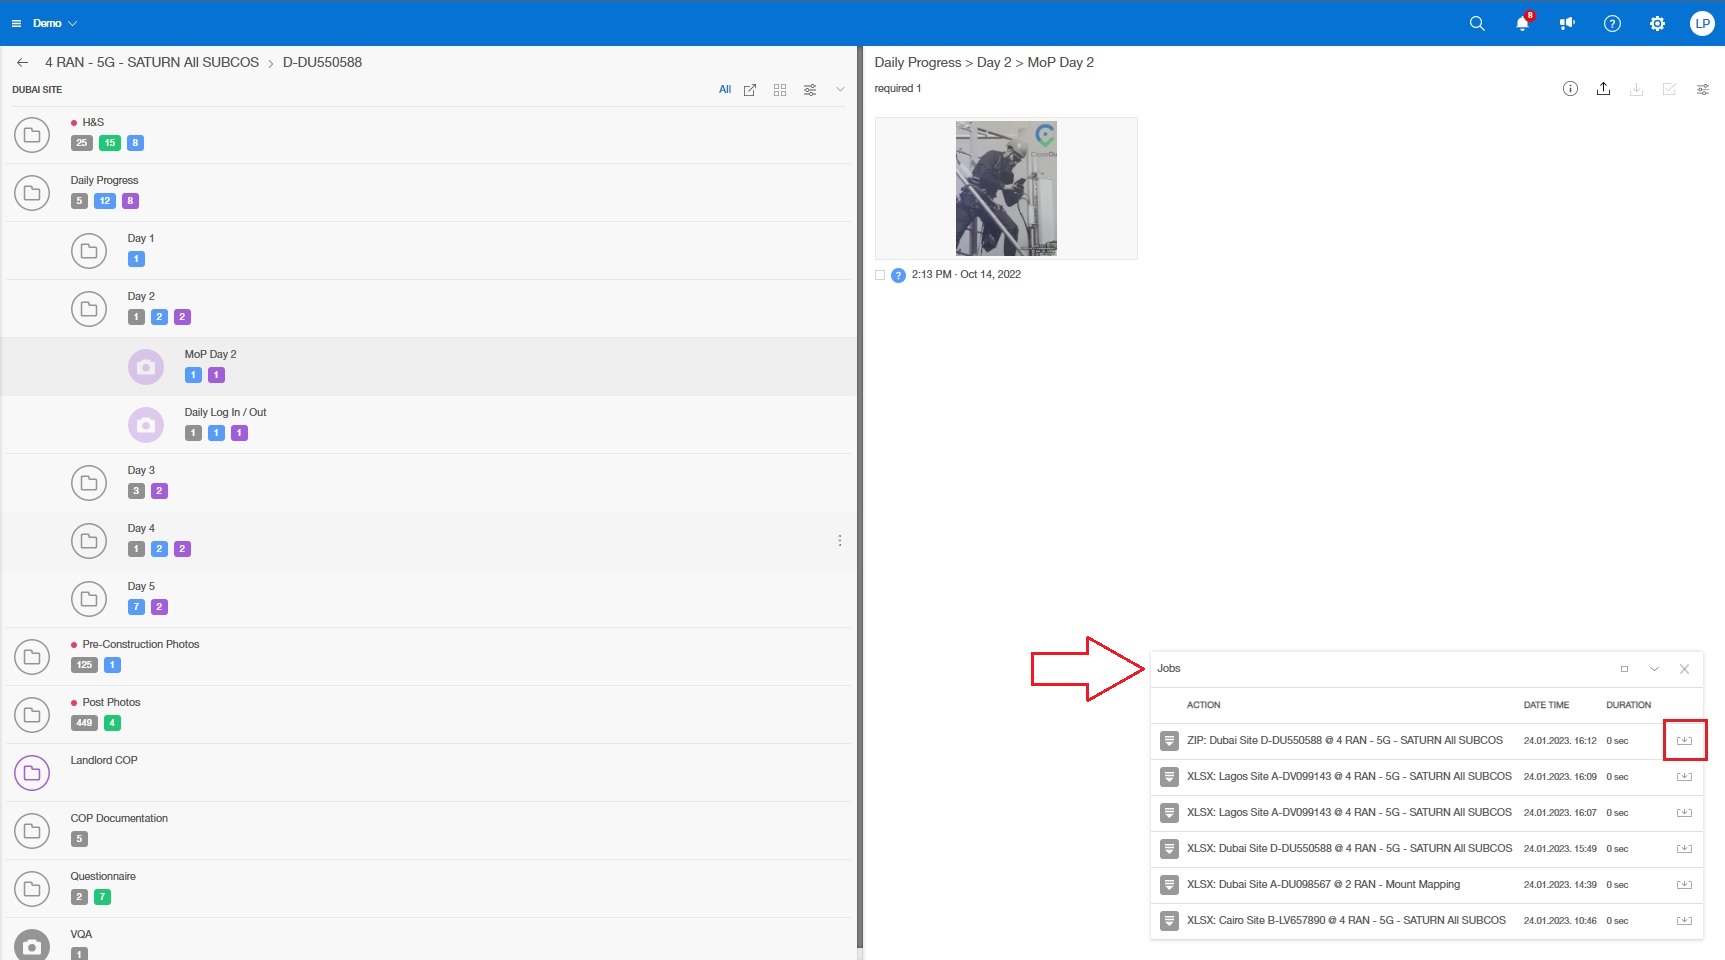
After the documentation is generated, in the bottom right corner, you will see a pop-up. Click the download icon and save the report.
How to exclude or include a folder or a placeholder from an export?
If you want to remove a folder or a subfolder from a CloseOut package export, or to add it, here is how to set it up:
- Go to Administration > Templates
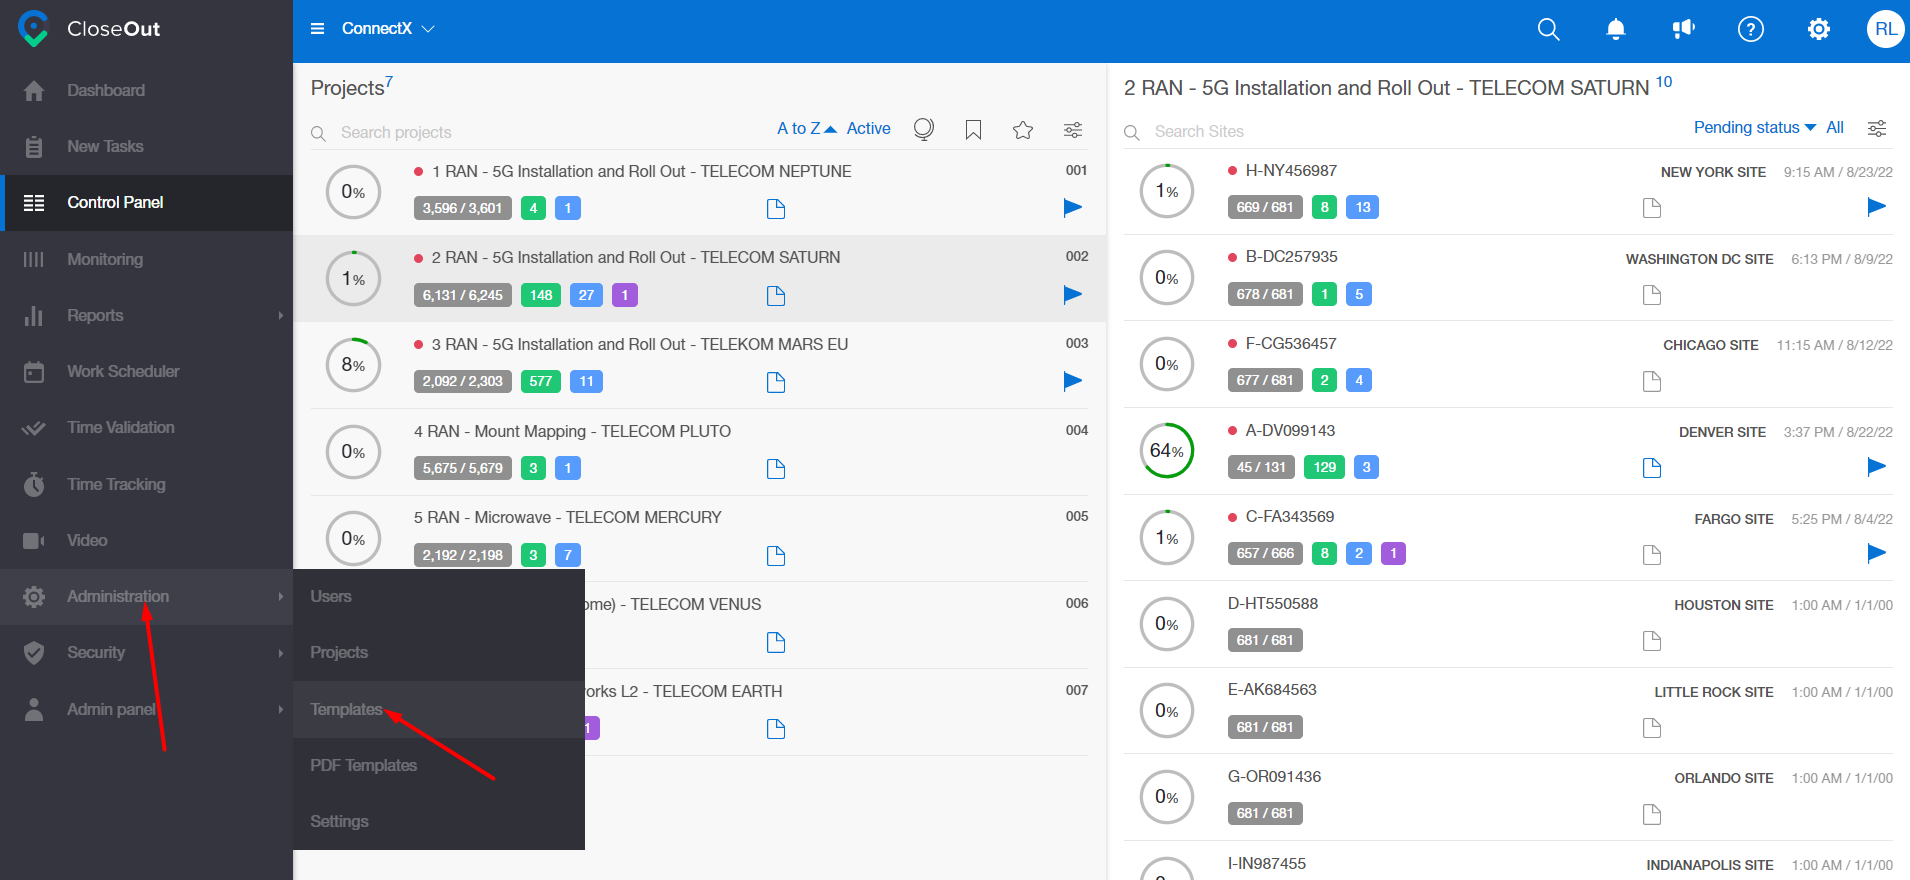
- Select a project of the site you would like to export. Click on the pen icon in order to edit the folder
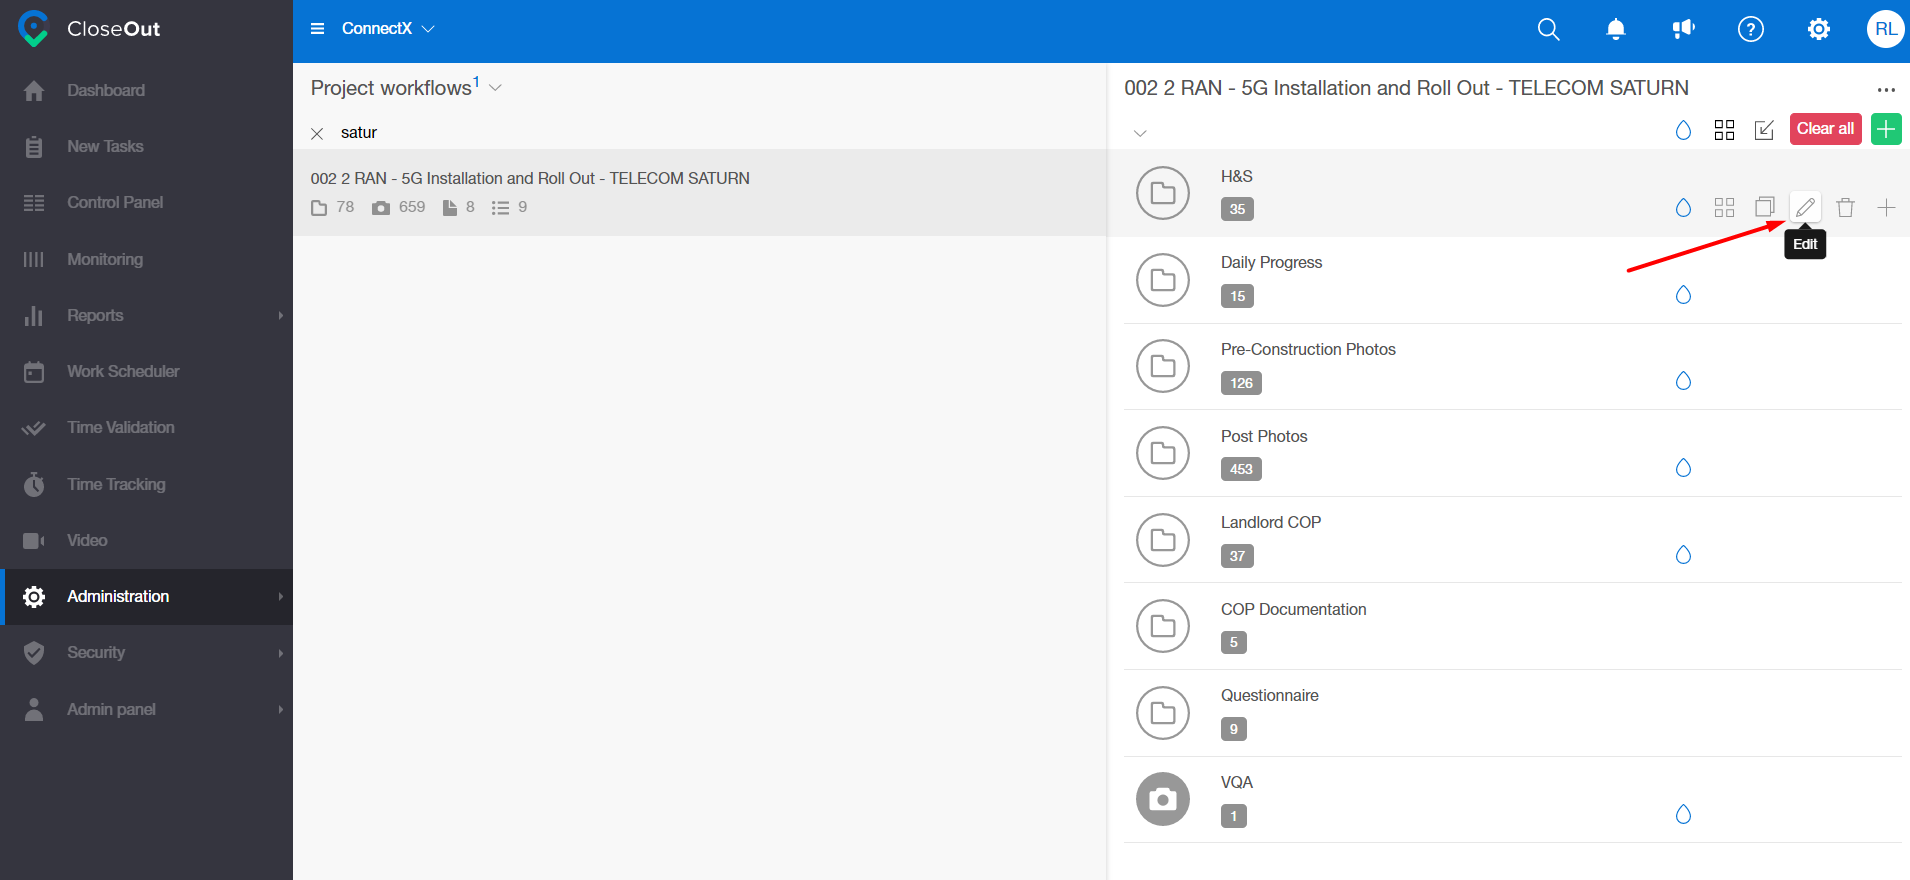
- Click on the Export options
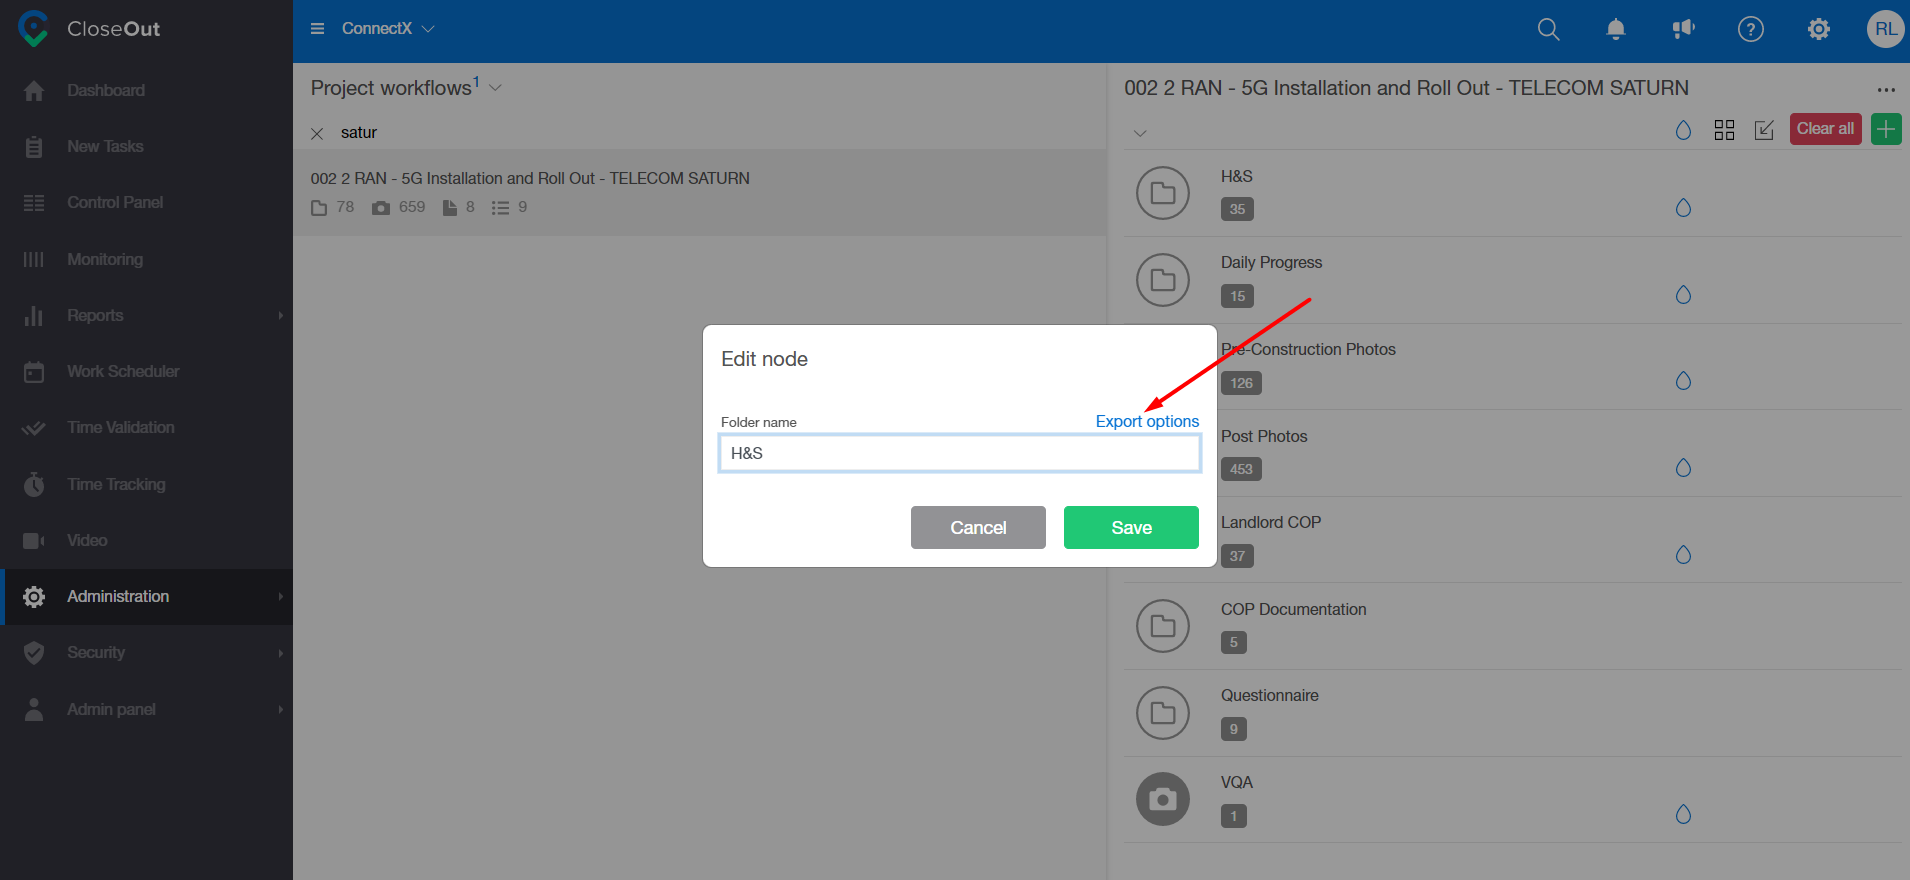
- Choose the export options you would like to apply to this project and click Save.

This can be applied on a project level for all the sites, which can include numerous other folders and photo placeholders. Once desired export options are chosen (e.g. PDF and ZIP), this will be applied to all folders and photo placeholders within that project and all these placeholders will be exported together.
If you wish to remove a certain placeholder from the site export or to add it, you need to un/check the export options you previously chose for a project.
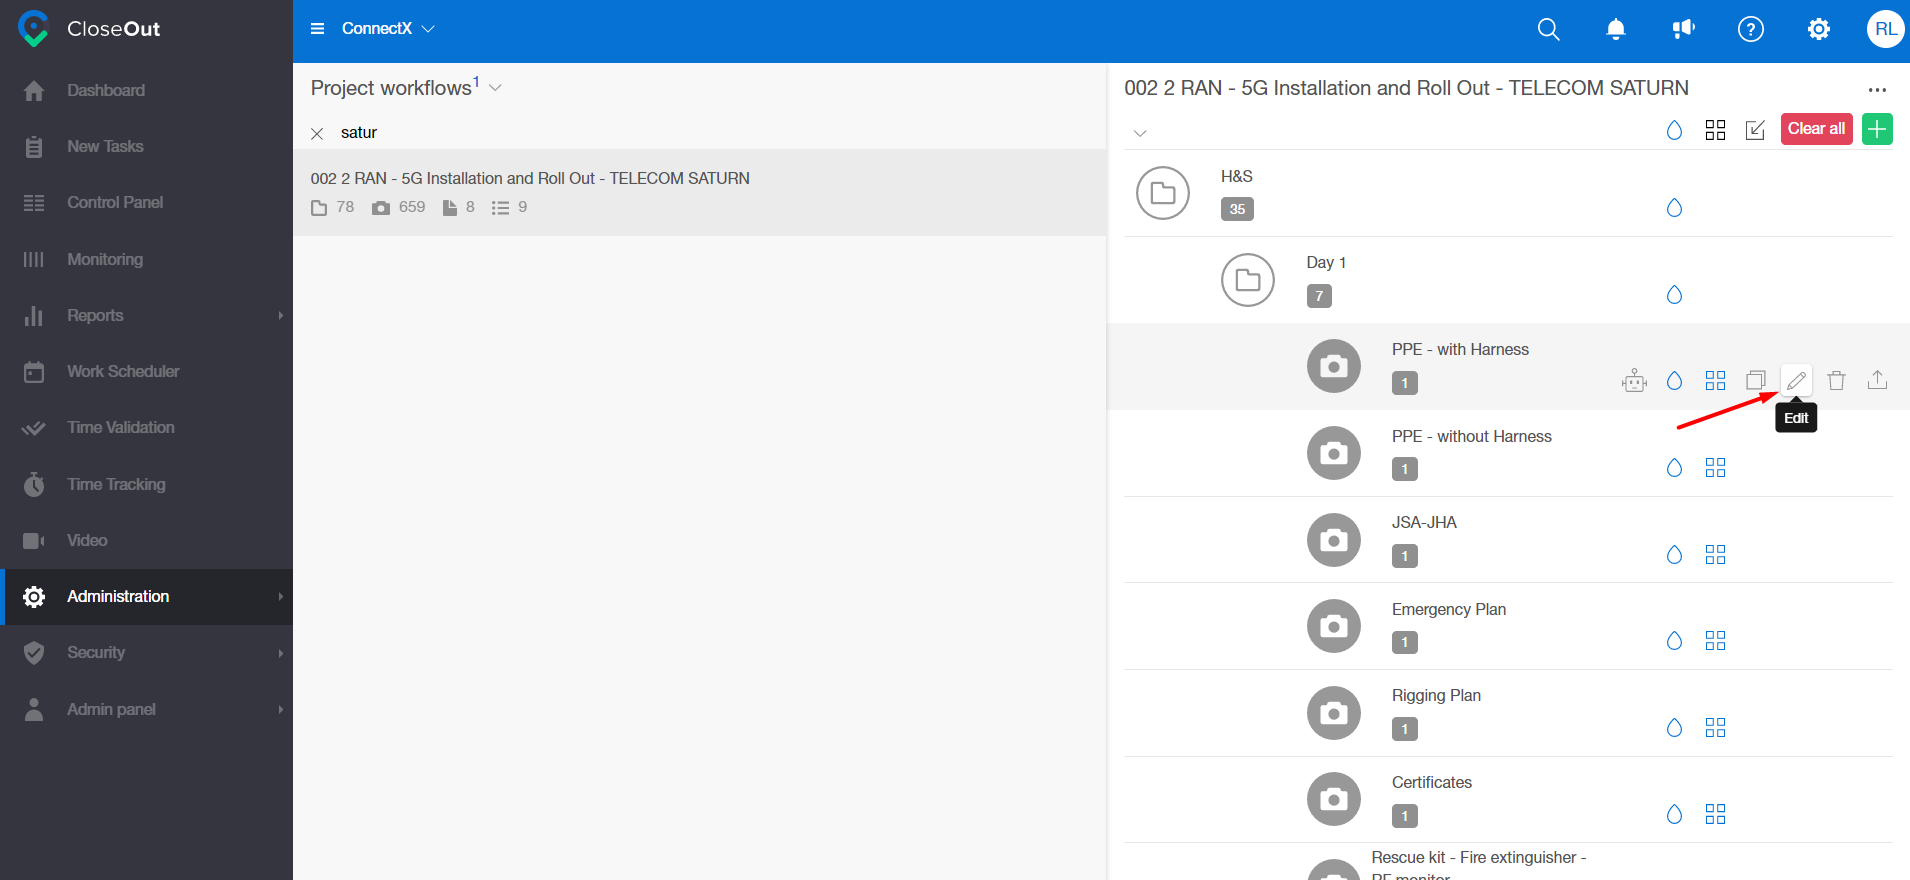
- Go through the folder structure and find a specific photo placeholder you would like to exclude from the export and click on the edit button
- Click on the Export options.
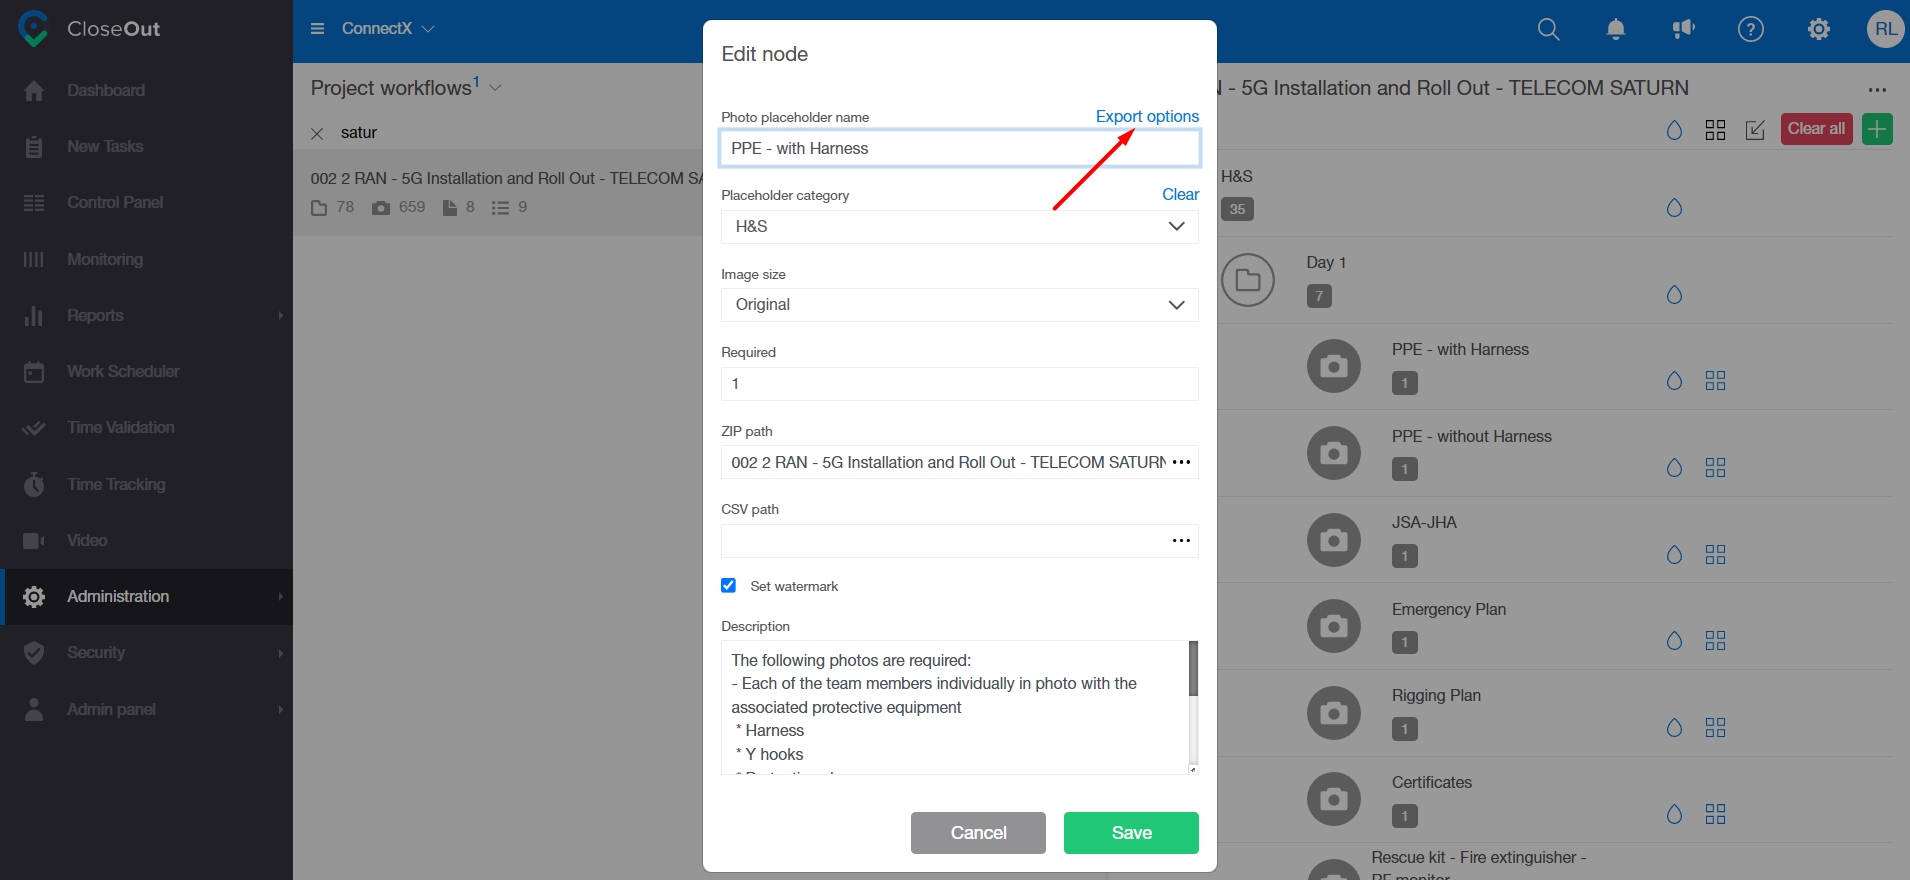
- Choose the export options you would like to apply on this particular photo placeholder and click Save.
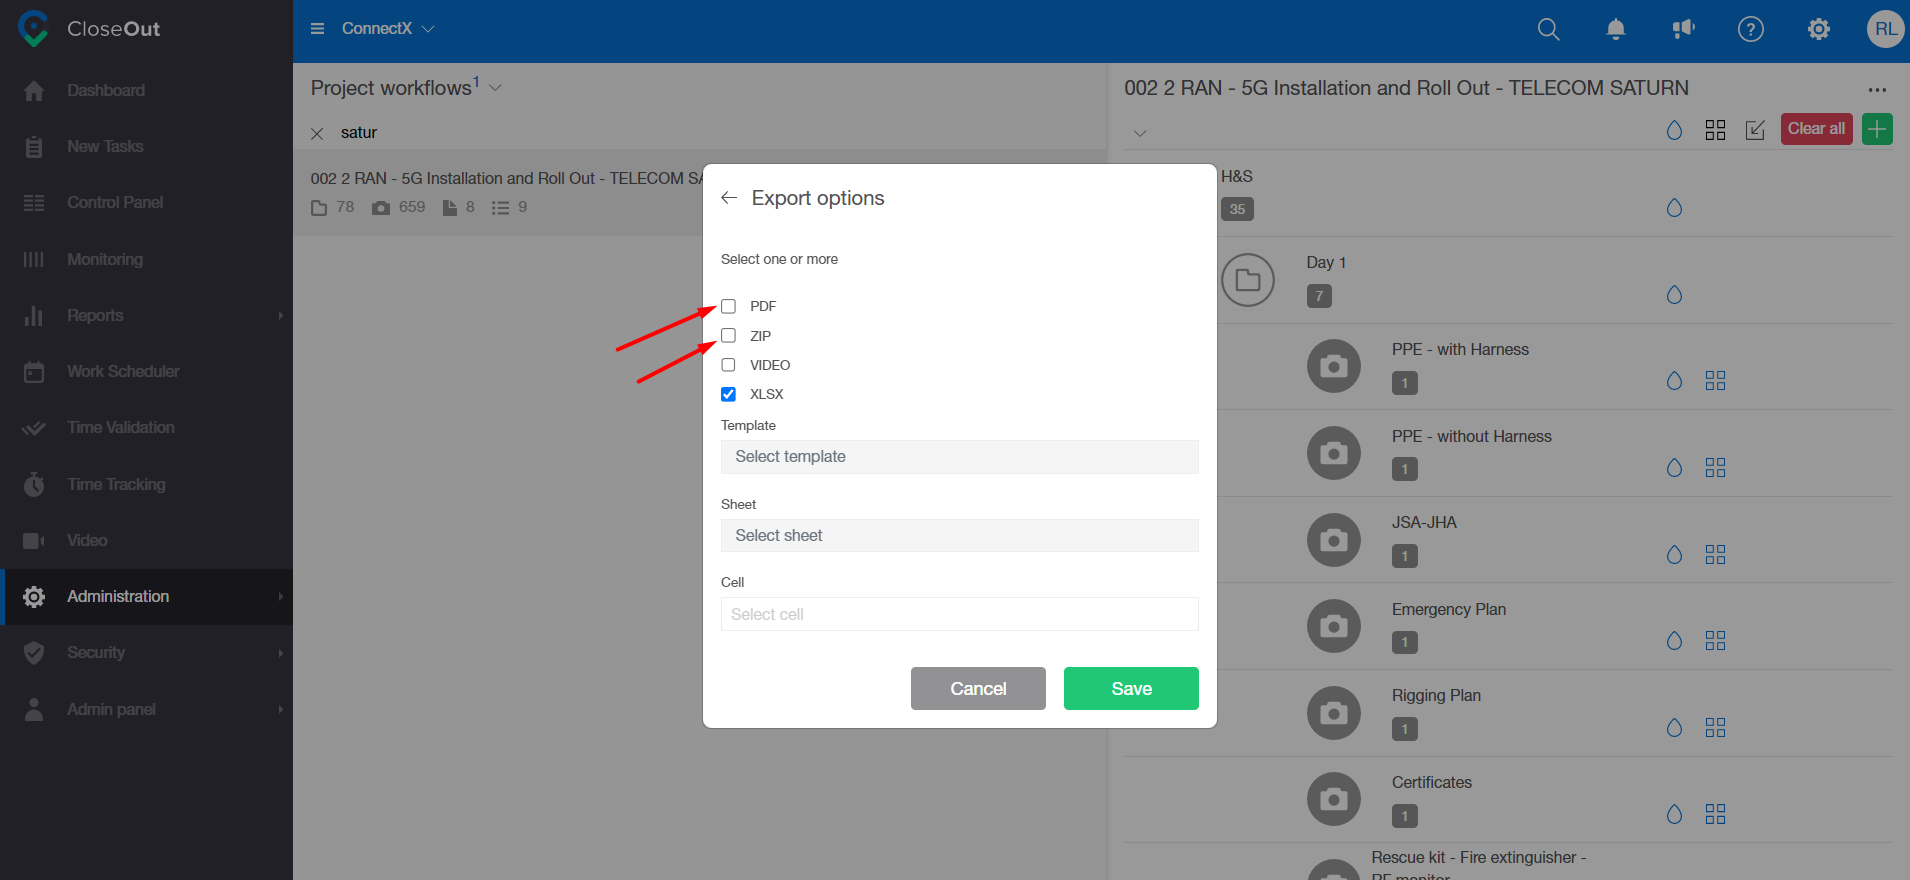
By unchecking the PDF and ZIP boxes, this particular photo placeholder will not be included when you export the site. This is how you include or exclude the folders that are about to be exported with the site.