How to map out Excel close out package?

Written by Lada Paunovic
Updated at July 3rd, 2023
- Send your Excel template to your customer support manager to be added to your company's tenant.
1. Go to Administration>Templates 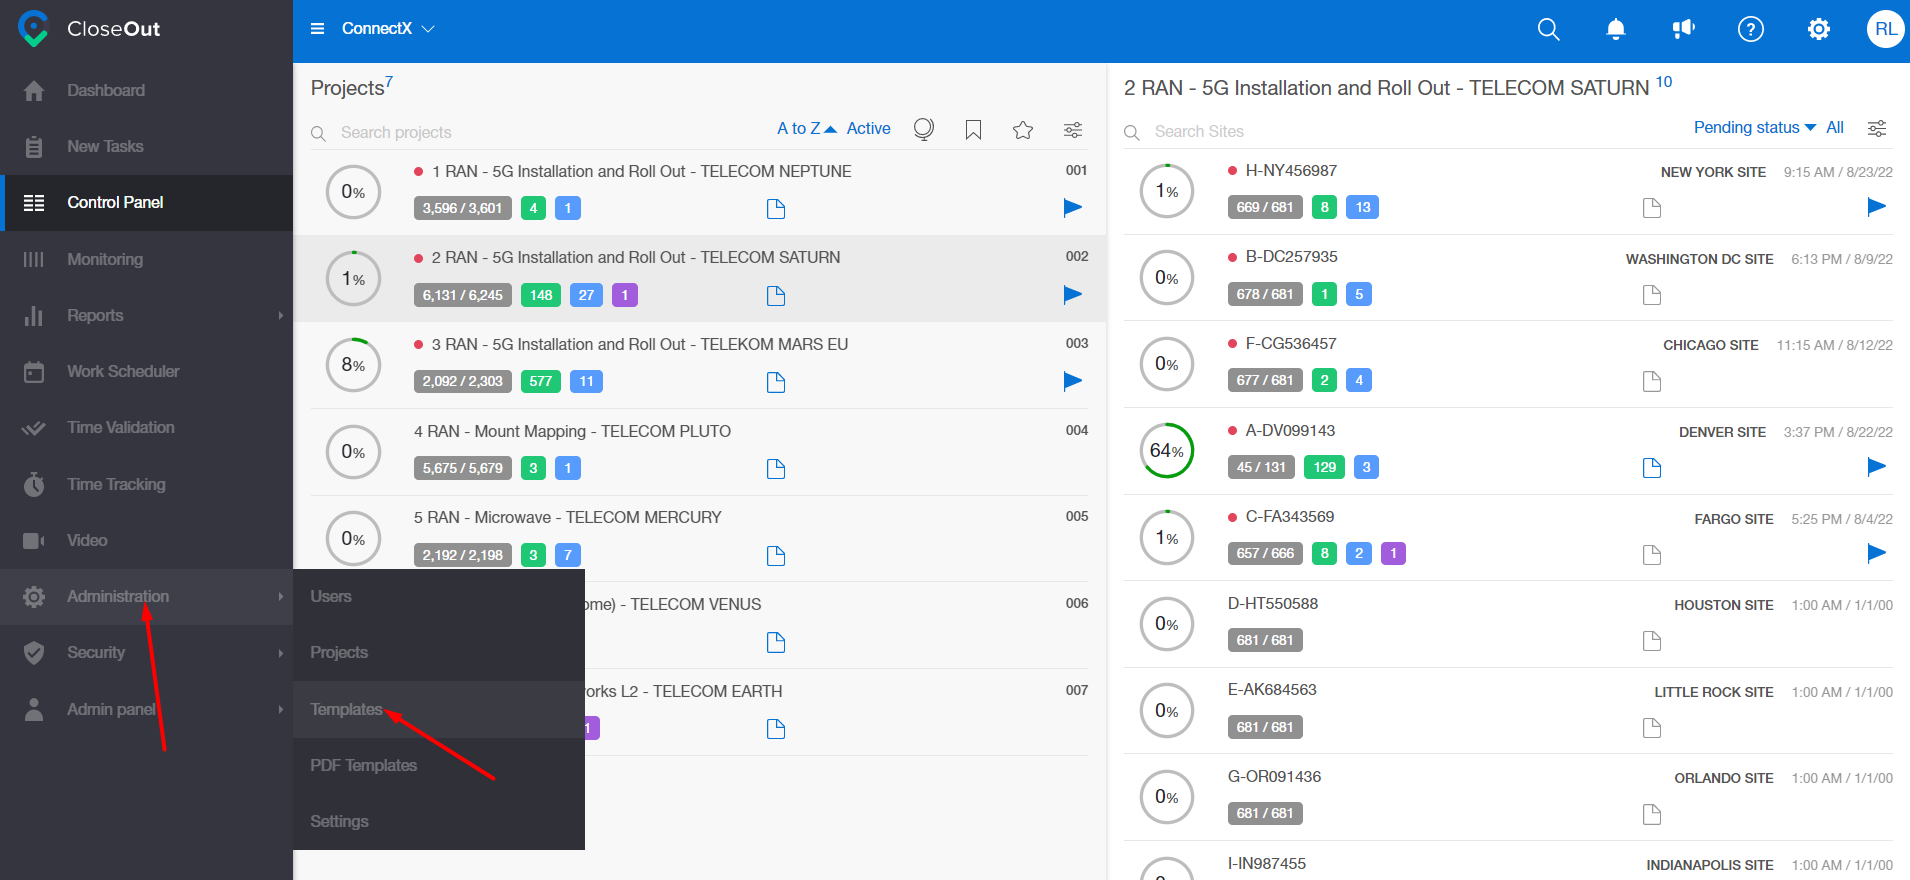
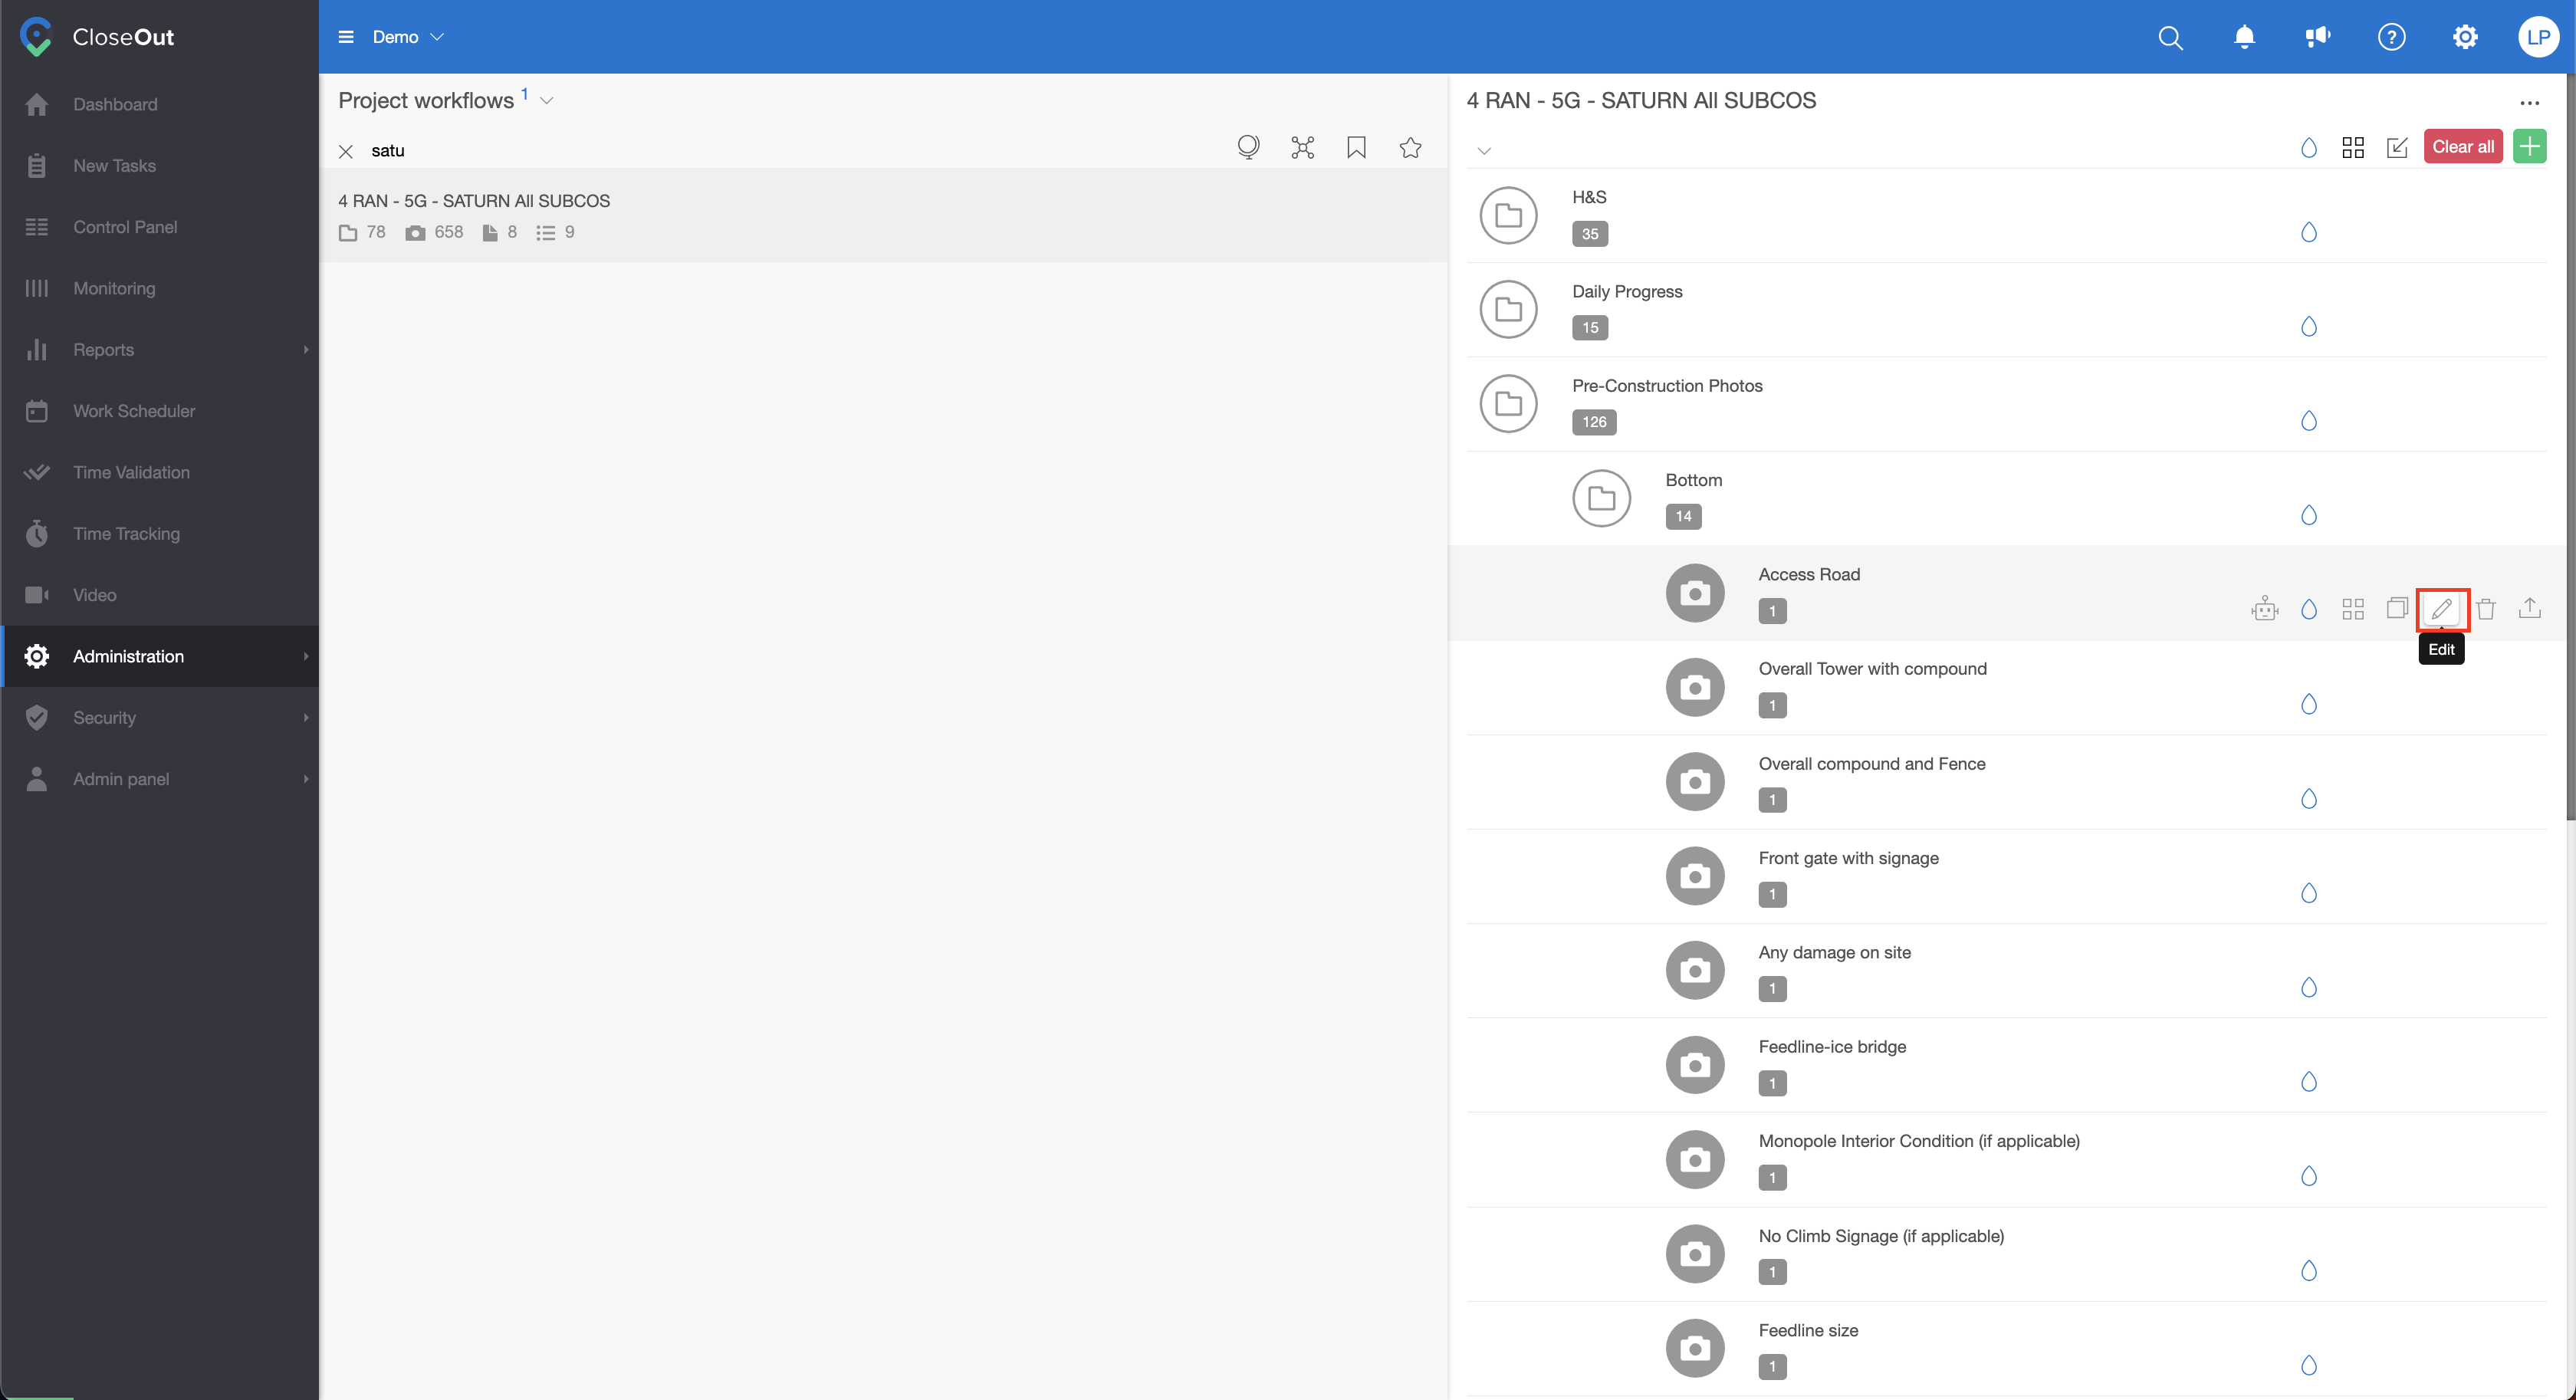
2. Select a project. On the right, you will see its folder structure.
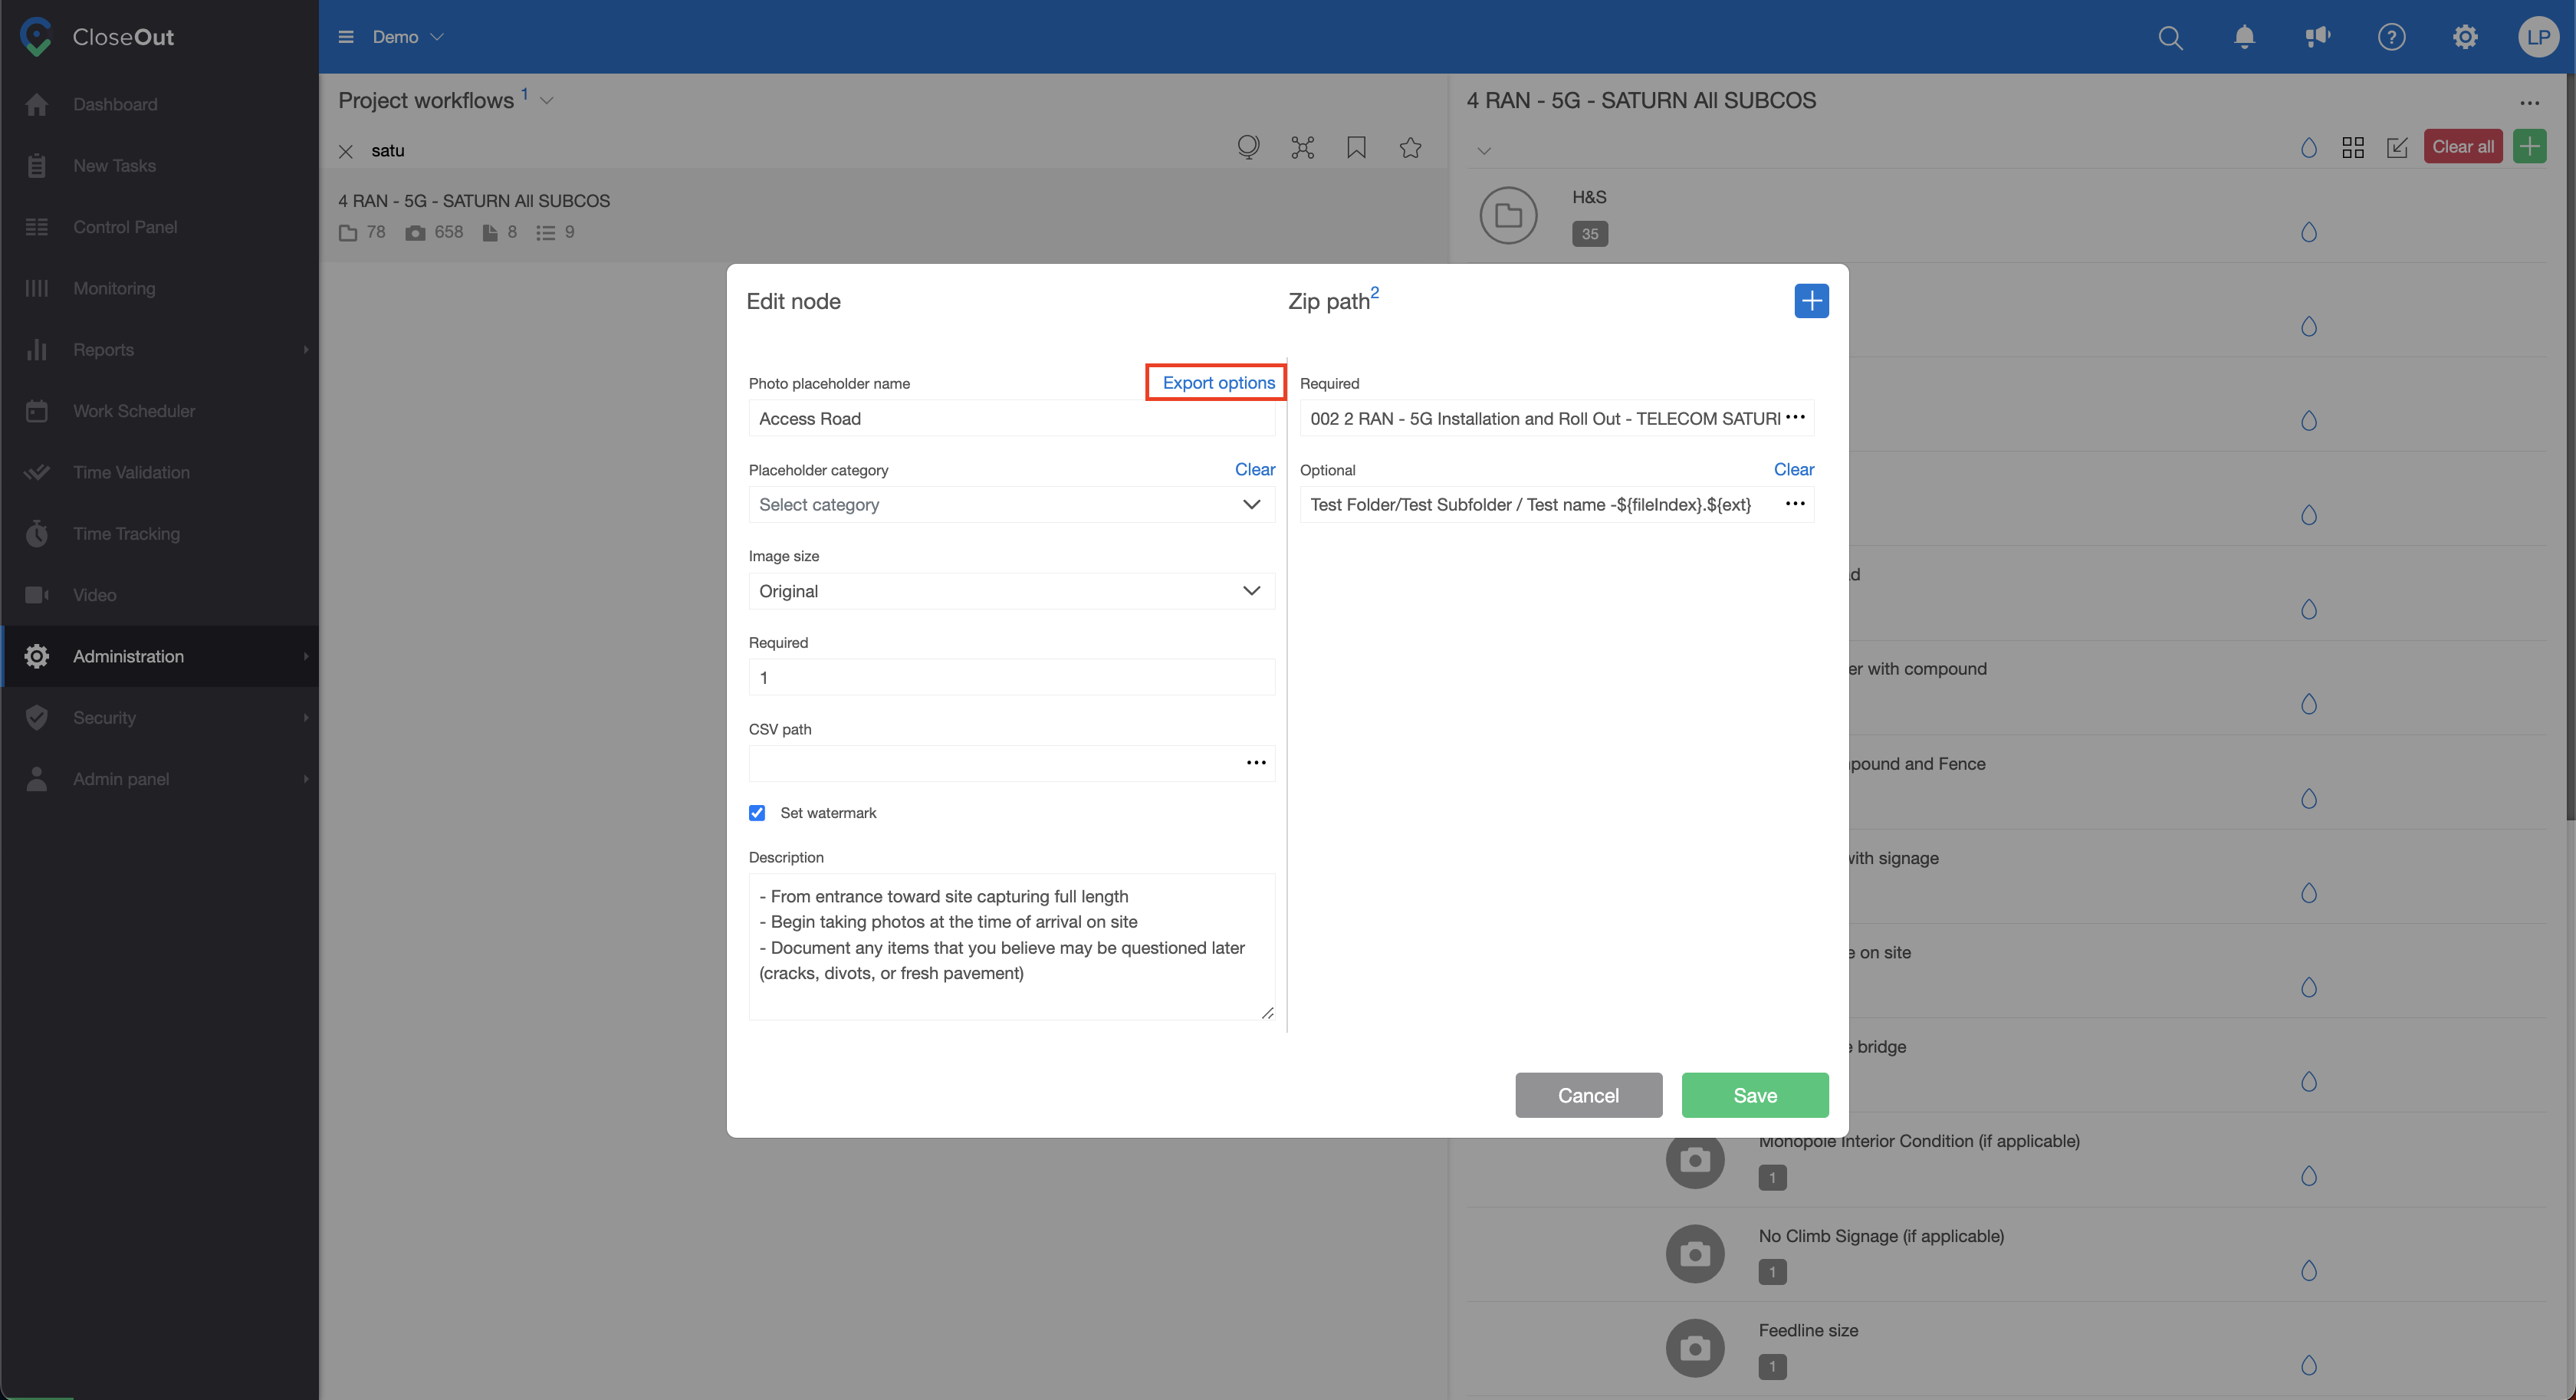
3. Go through the folder structure and find a specific photo placeholder you would like to have a different ZIP path in the export and click on the edit button.
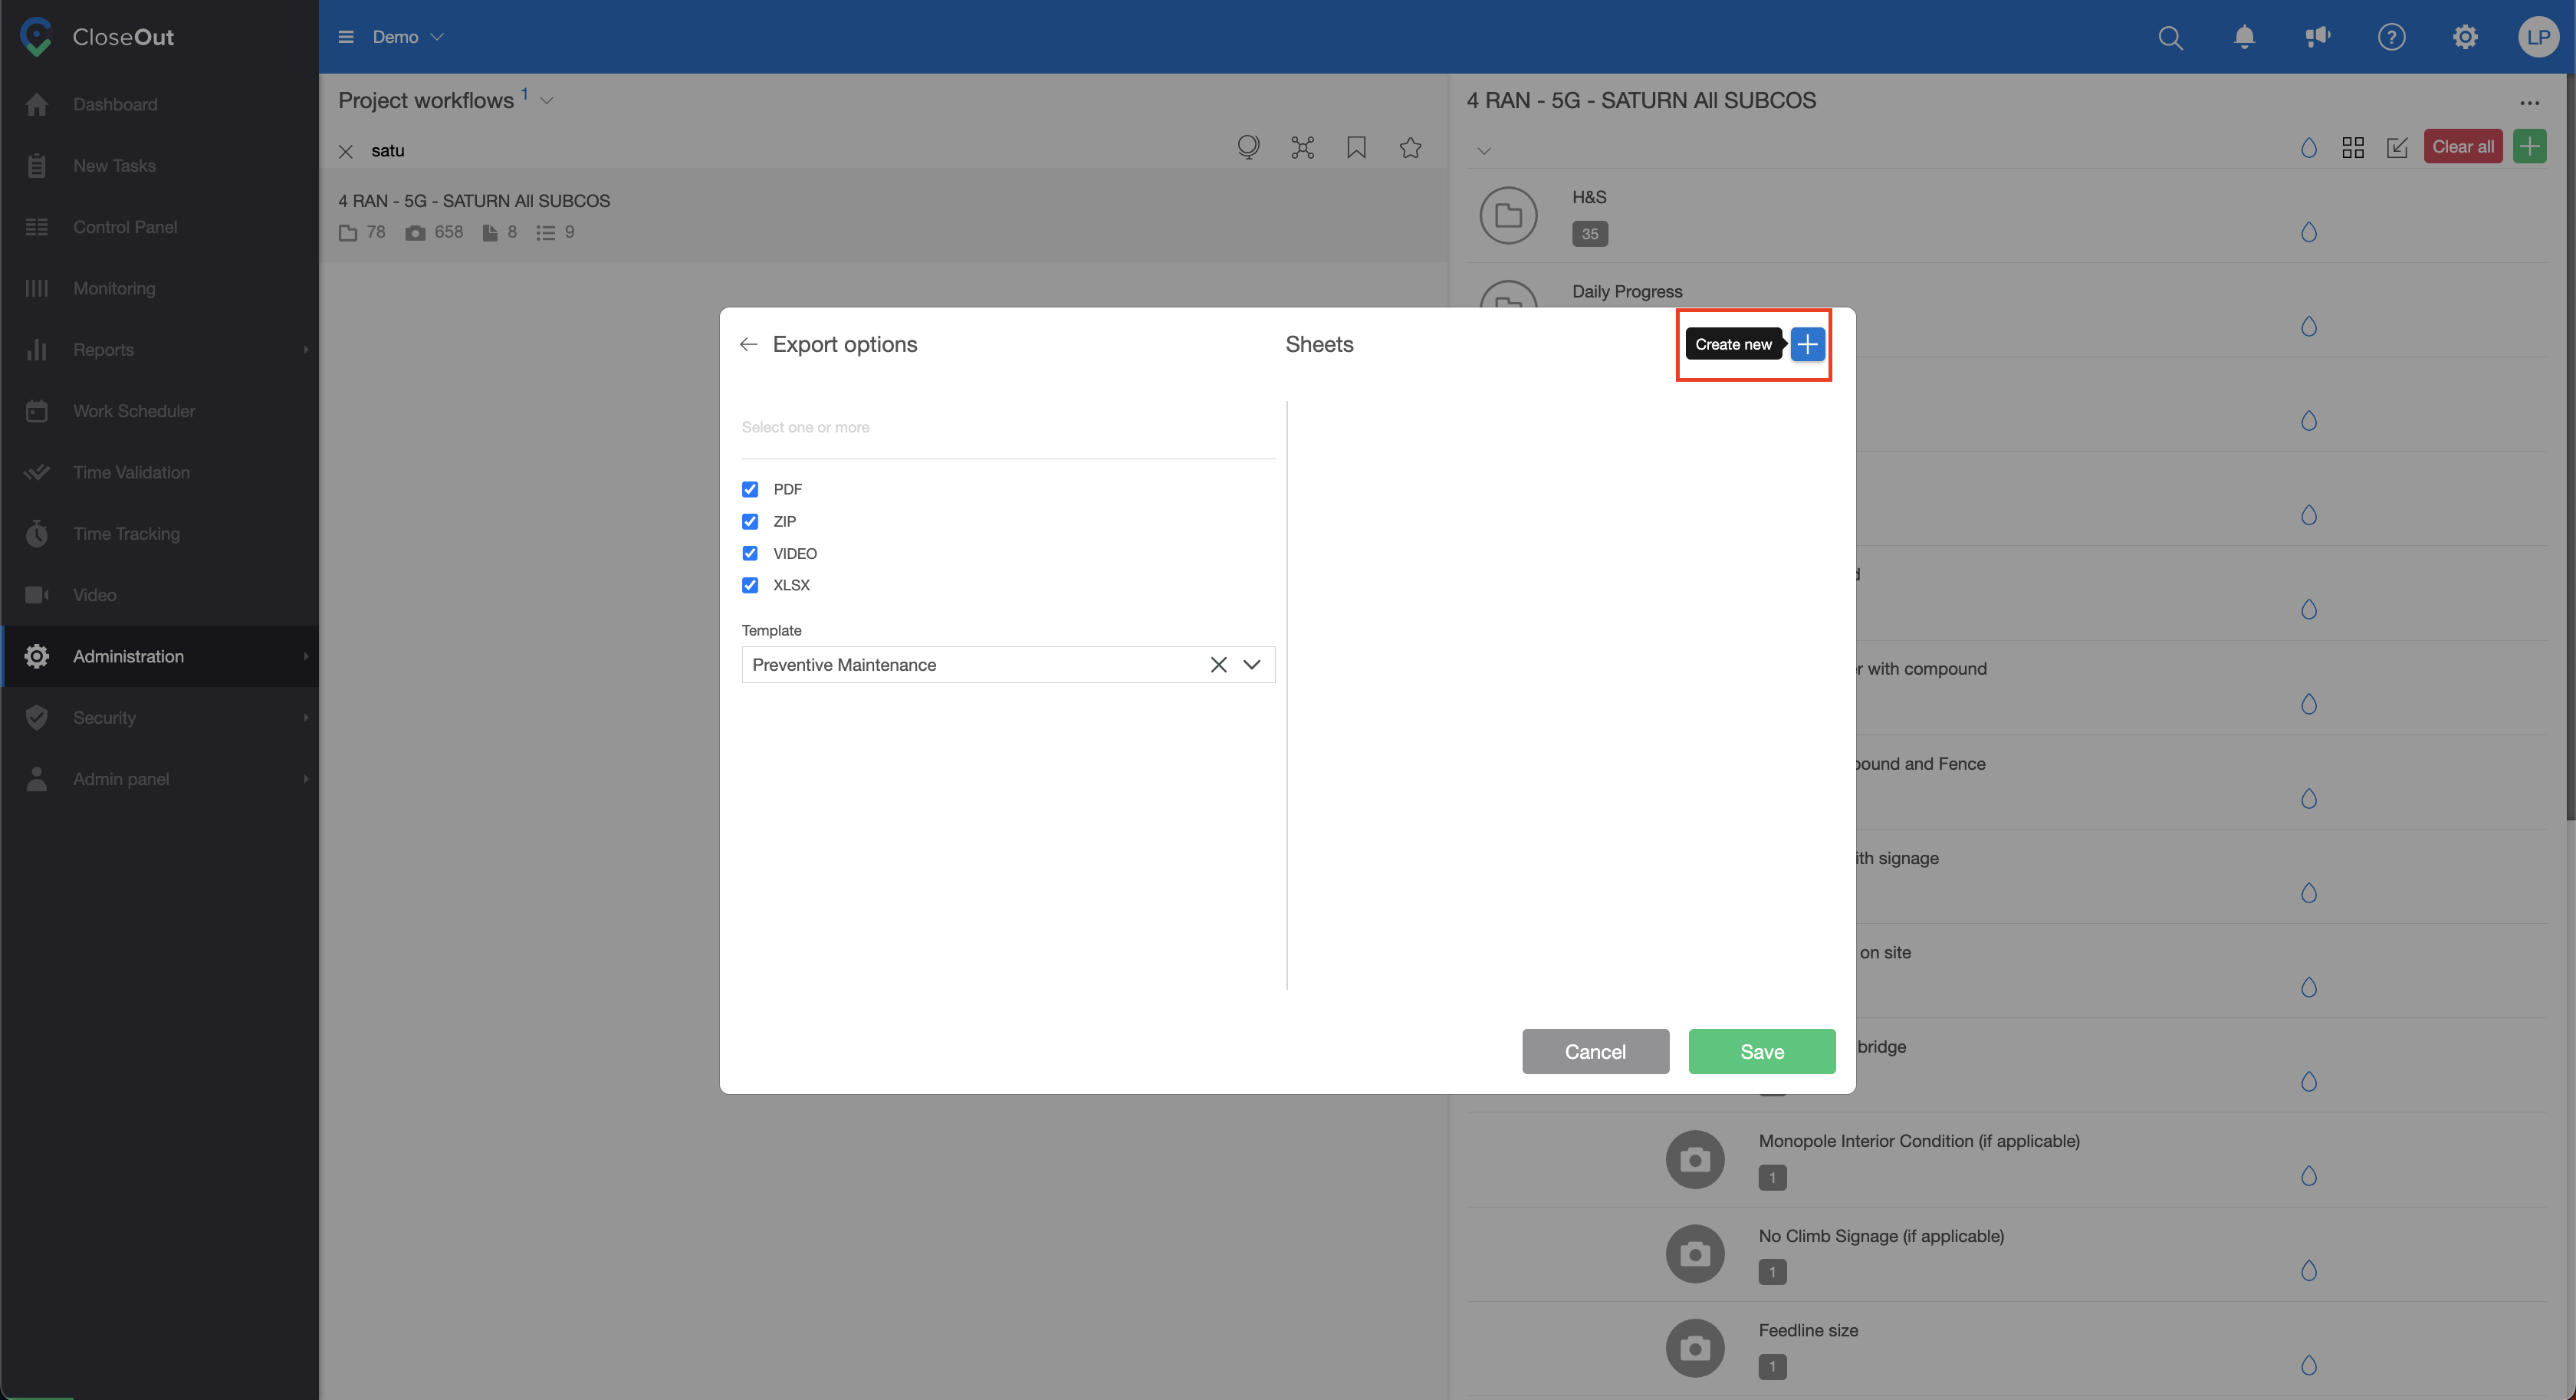
4. Click on the Export options.
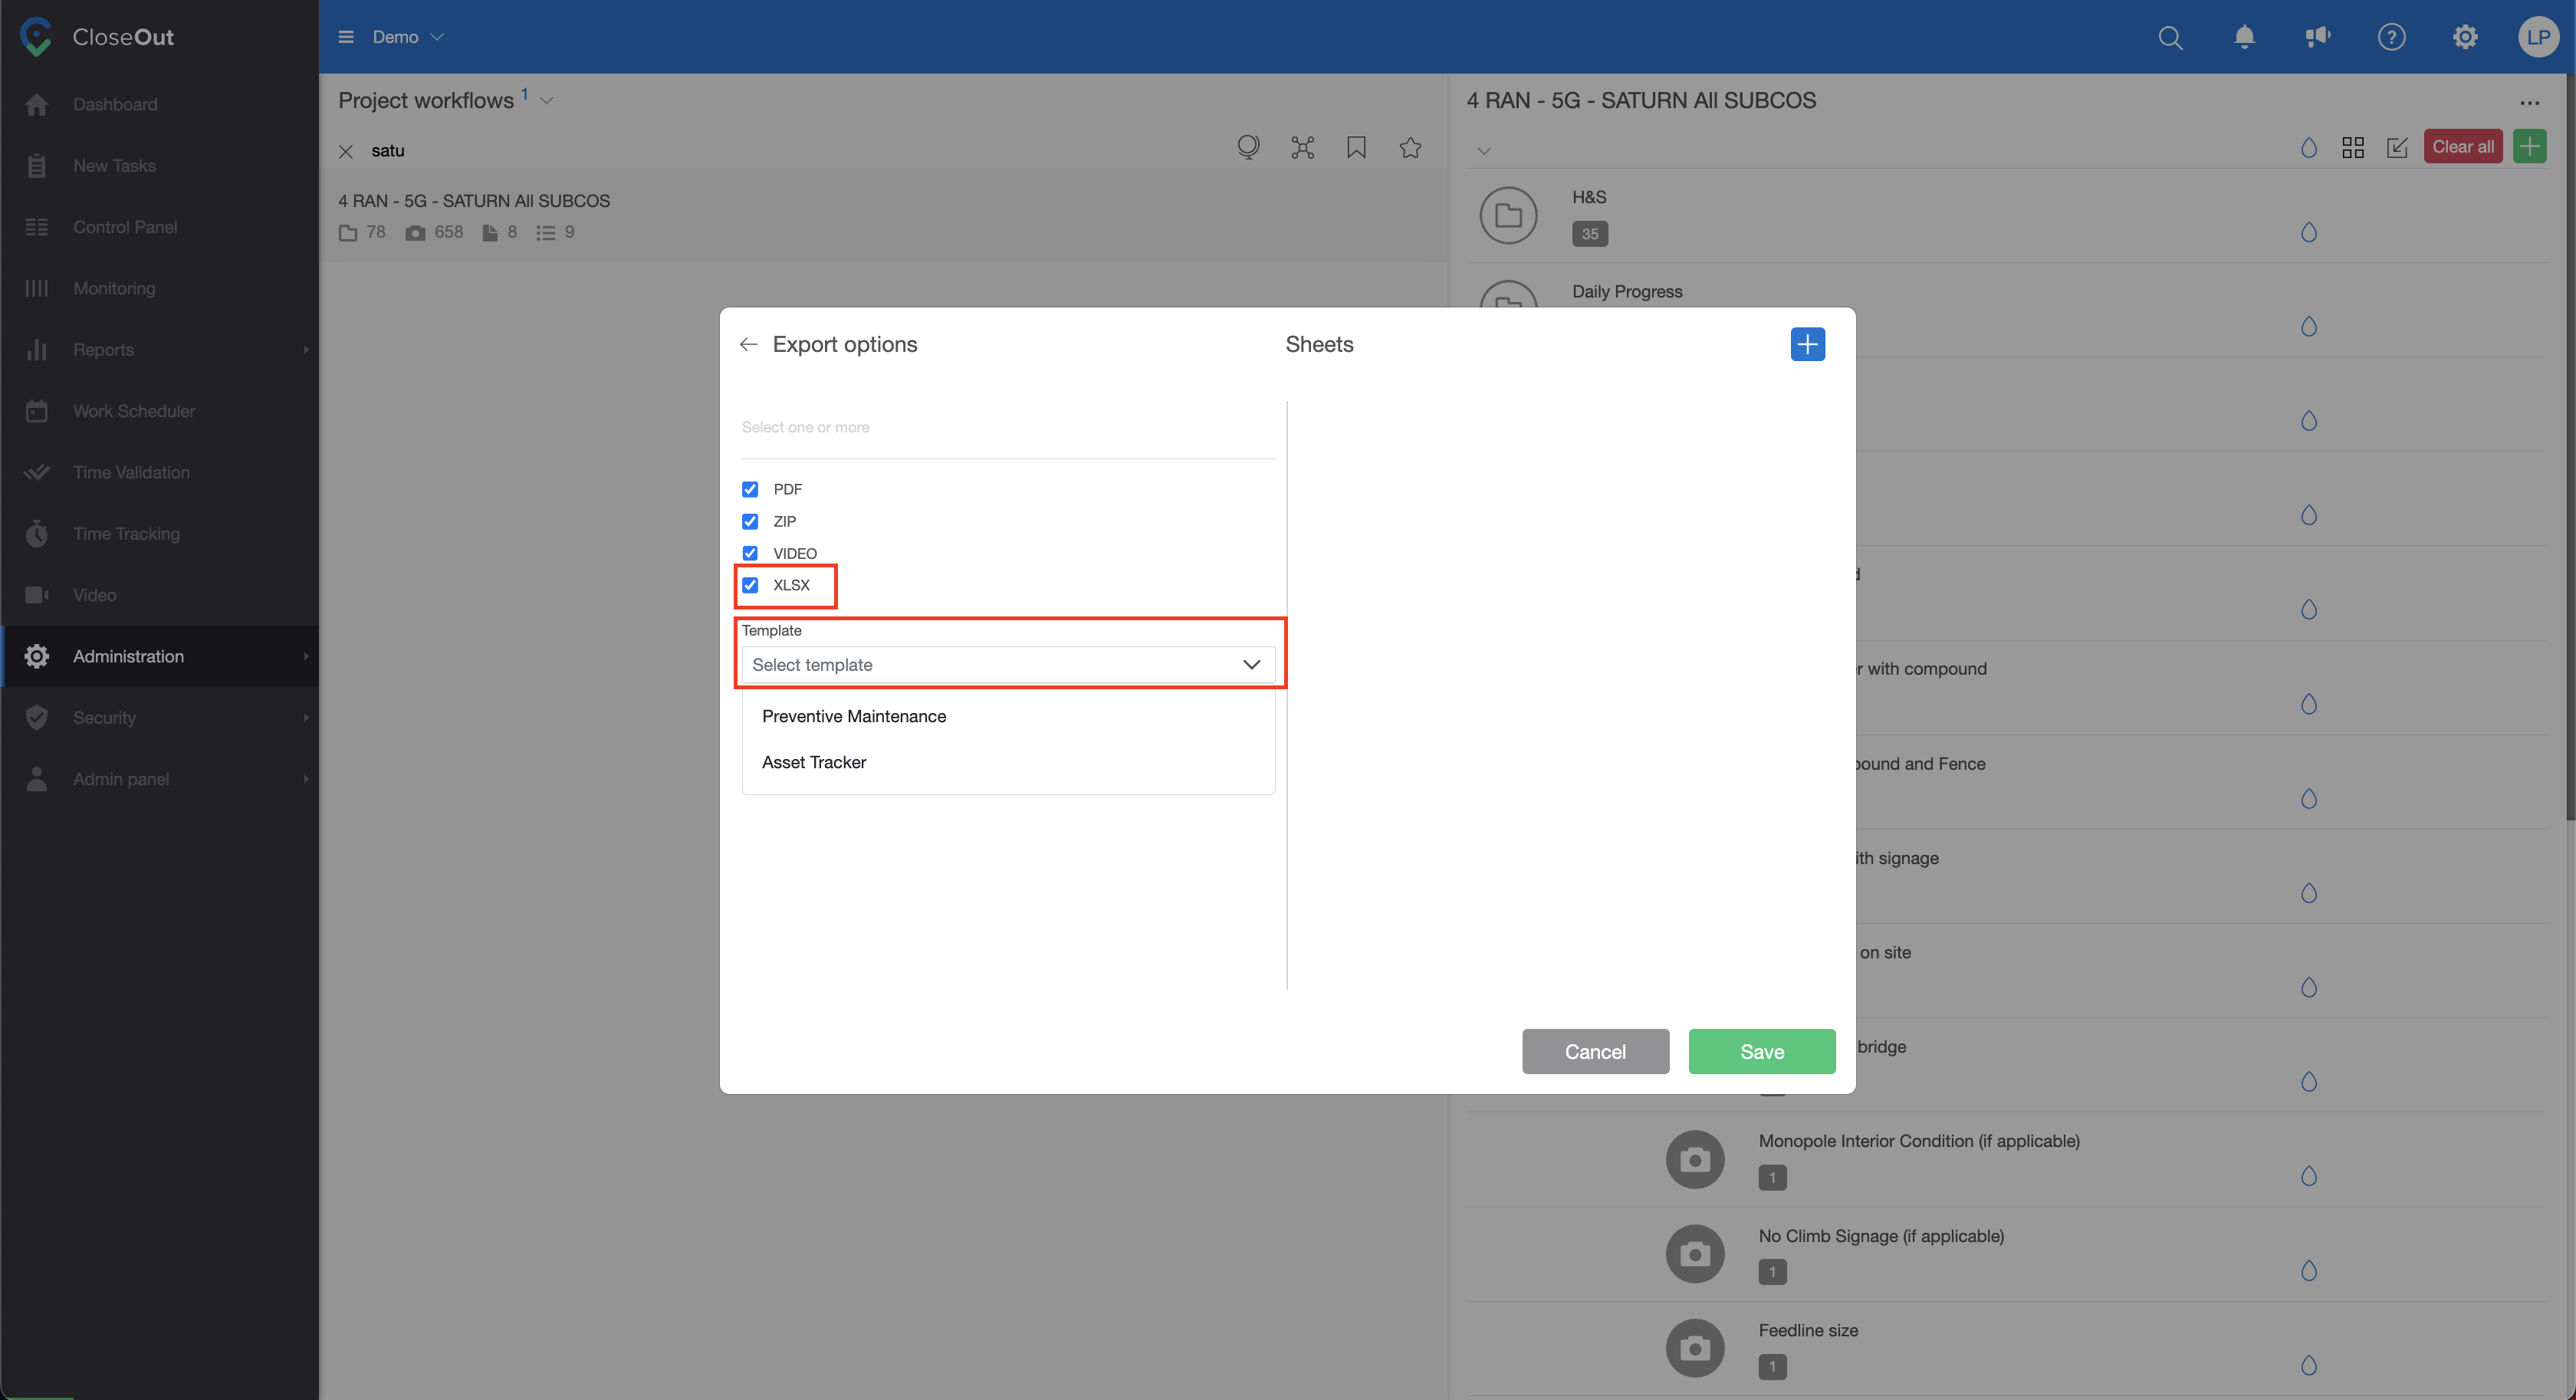
5. Make sure that this position is checked for XLSX export, and select your template from the list of uploaded templates. (Remember first to send your template to your Customer care manager)
6. Click on the right corner on the blue plus to set the mapping for a specific position.
7. Select a sheet from your template's list of automatically recognized sheets. Put the information about the cell column (for example - a) and row (for example - 1), and the information from the checklist or the photo will land in the exact cell (for example - a1). If the photo or a checklist has an additional comment that needs to be included in the Excel export, populate in the same manner the comment cell fields.

8. If the photo or a checklist answer should land in the group of cells, click on the blue word "Multi," and you will get the field to enter the cell range: column (a) and row (1) to column (c) and row (4) - and you will get a photo inside of the merge cell range from a1-c4.
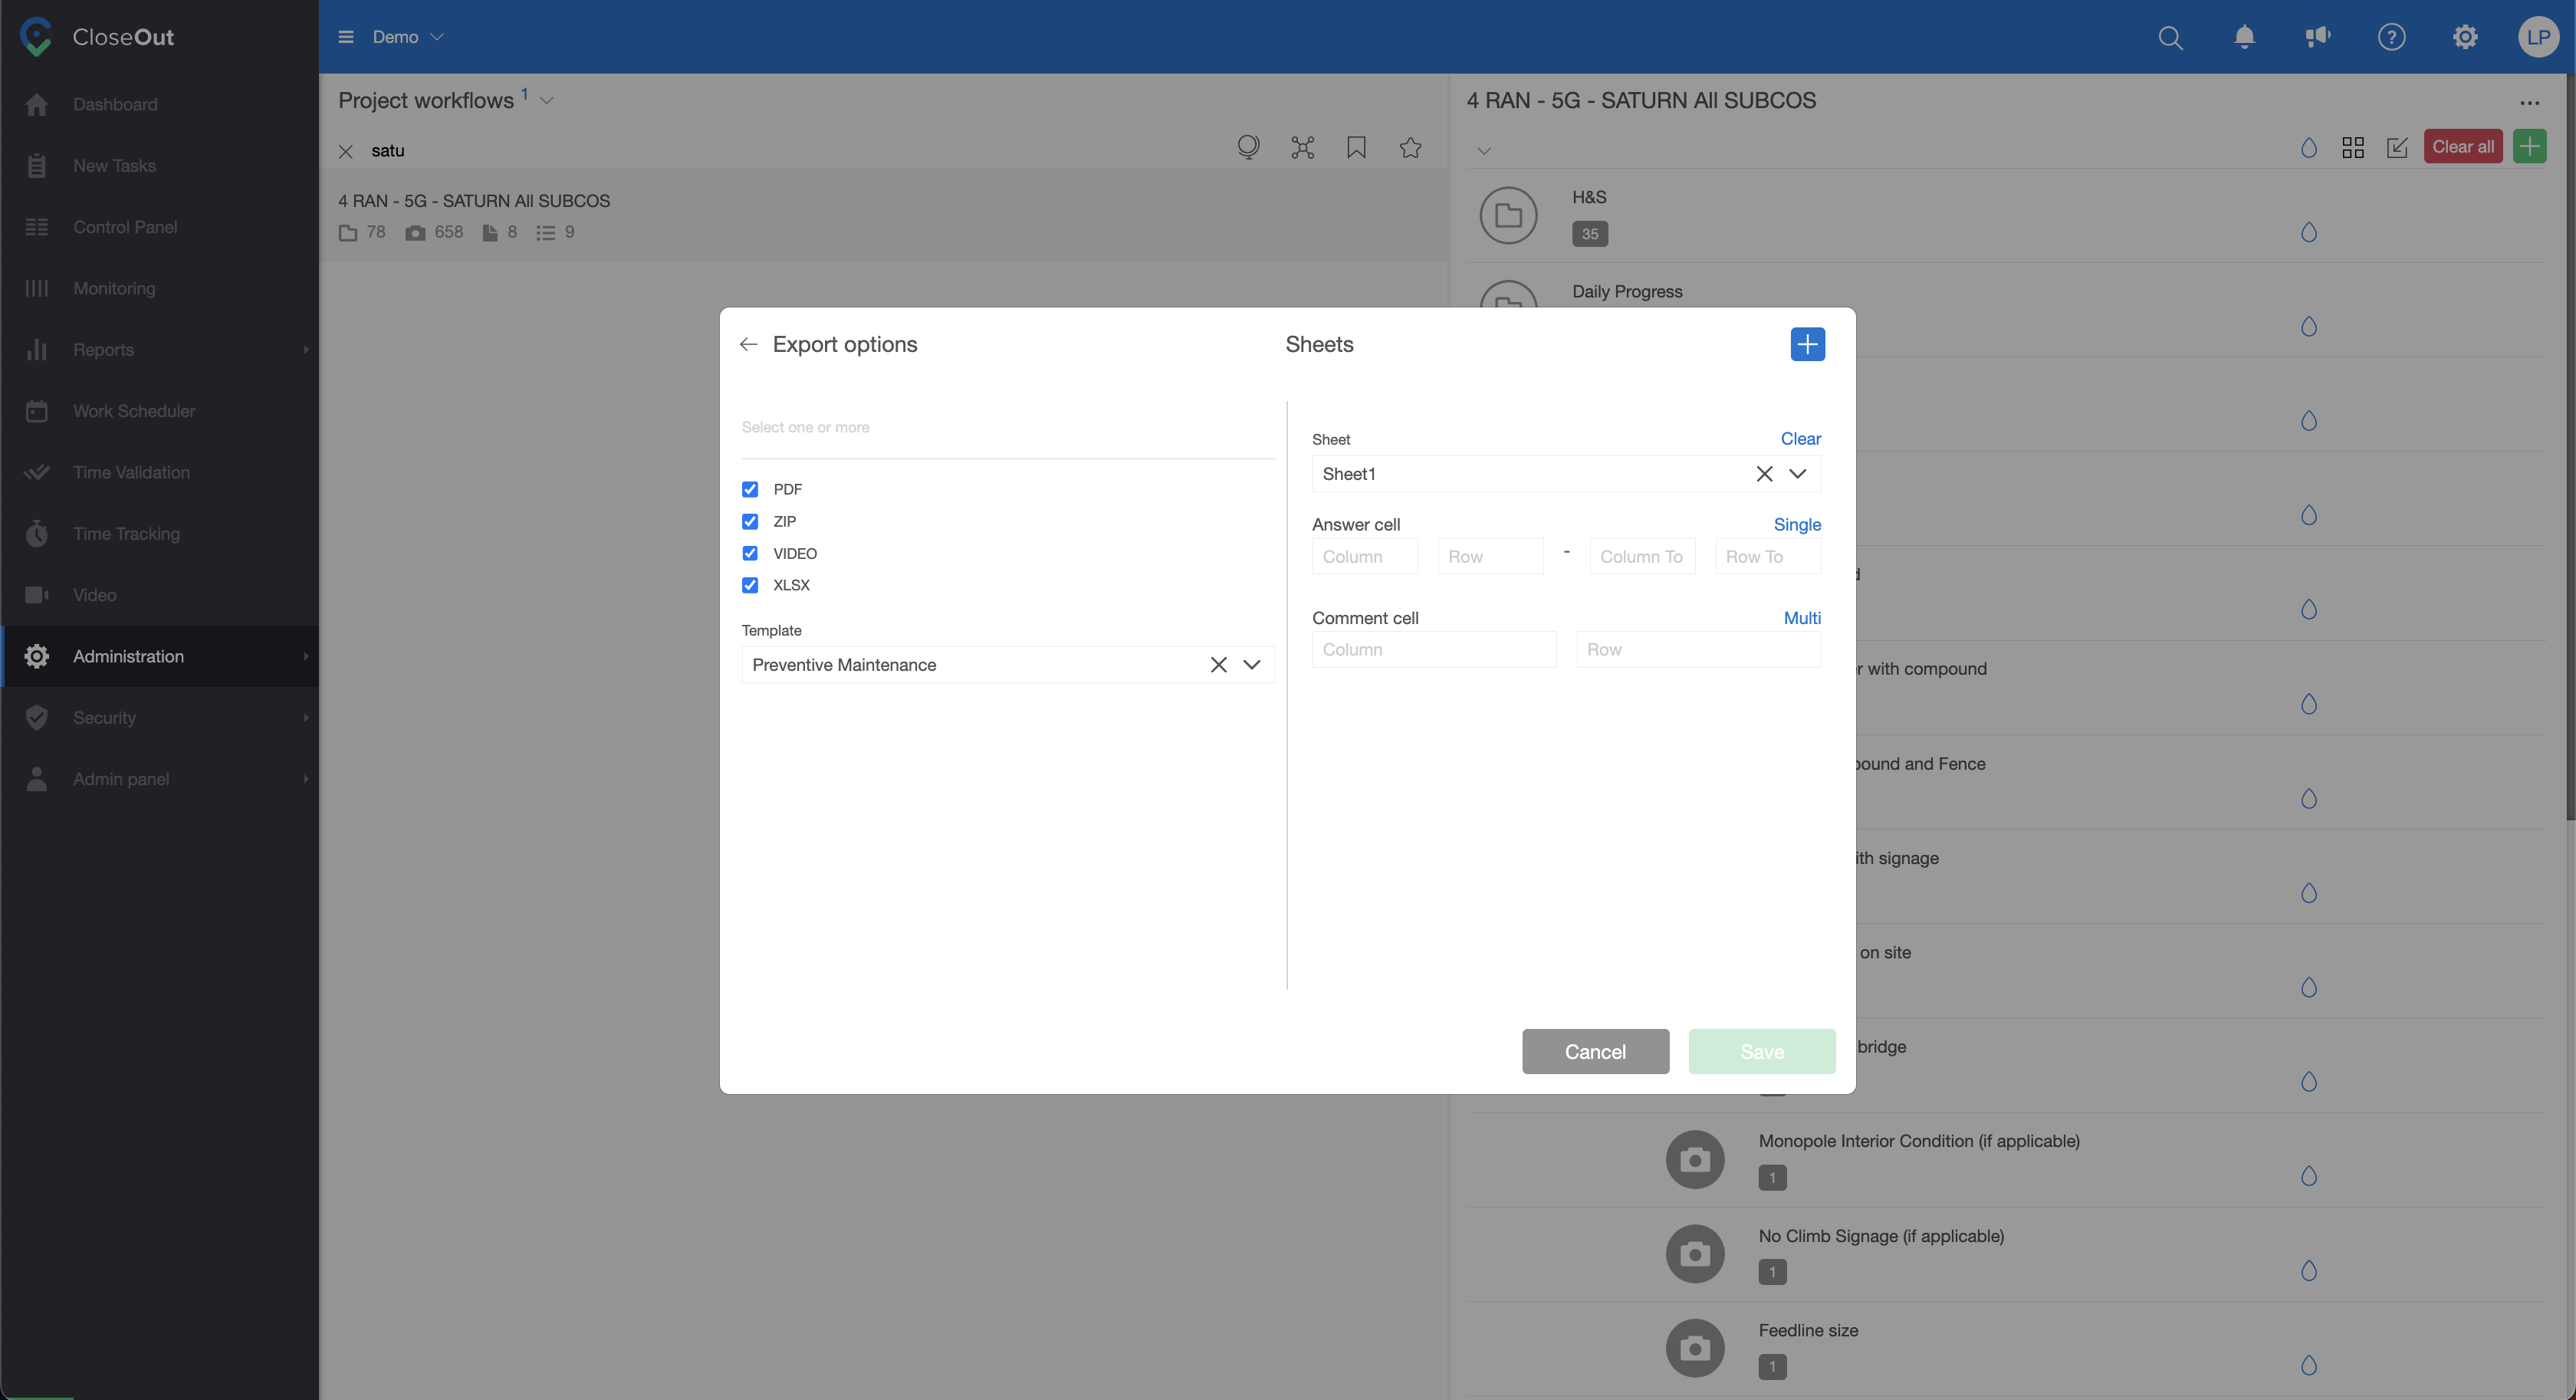
9. Click Save.
Repeat this process for all the positions you want to set for the Excel export.
This process needs to be done only once and will be applied to all the sites inside that project, and it can be imported together with the whole structure on other projects with the same workflow.
Double ZIP path
When you need one document in two different places in your close-out package (for example, one on one sheet and one on the other), there is no need to ask your field crews to take double pictures or your documentation department to copy them.
One document can have multiple Excel mapping and automatically be copied and put in the suitable sheets and cells. Here is how:
- Click Administration/Templates
- Choose your project
- In the folder structure, find the placeholder and click on the pencil icon to edit it.
- Click on the Export options. Click on the plus icon in the top right corner for each new mapping.
- Add additional mapping cell.